
Hello Ladybug SWAP Card 🐞
Hello everyone! Time to share another great card with you. I recently participated in a Spring Catalog card SWAP with some fellow demonstrators. I used the ADORABLE Hello Ladybug Bundle.

I started with a 4-1/4" x 11" Real Red card base scored at 5-1/2" and folded in half. Next, I embossed a 4" x 5 1/4" piece of Basic Black cardstock using the fun polka dot Embossing Folder from the Checks & Dots combo pack.

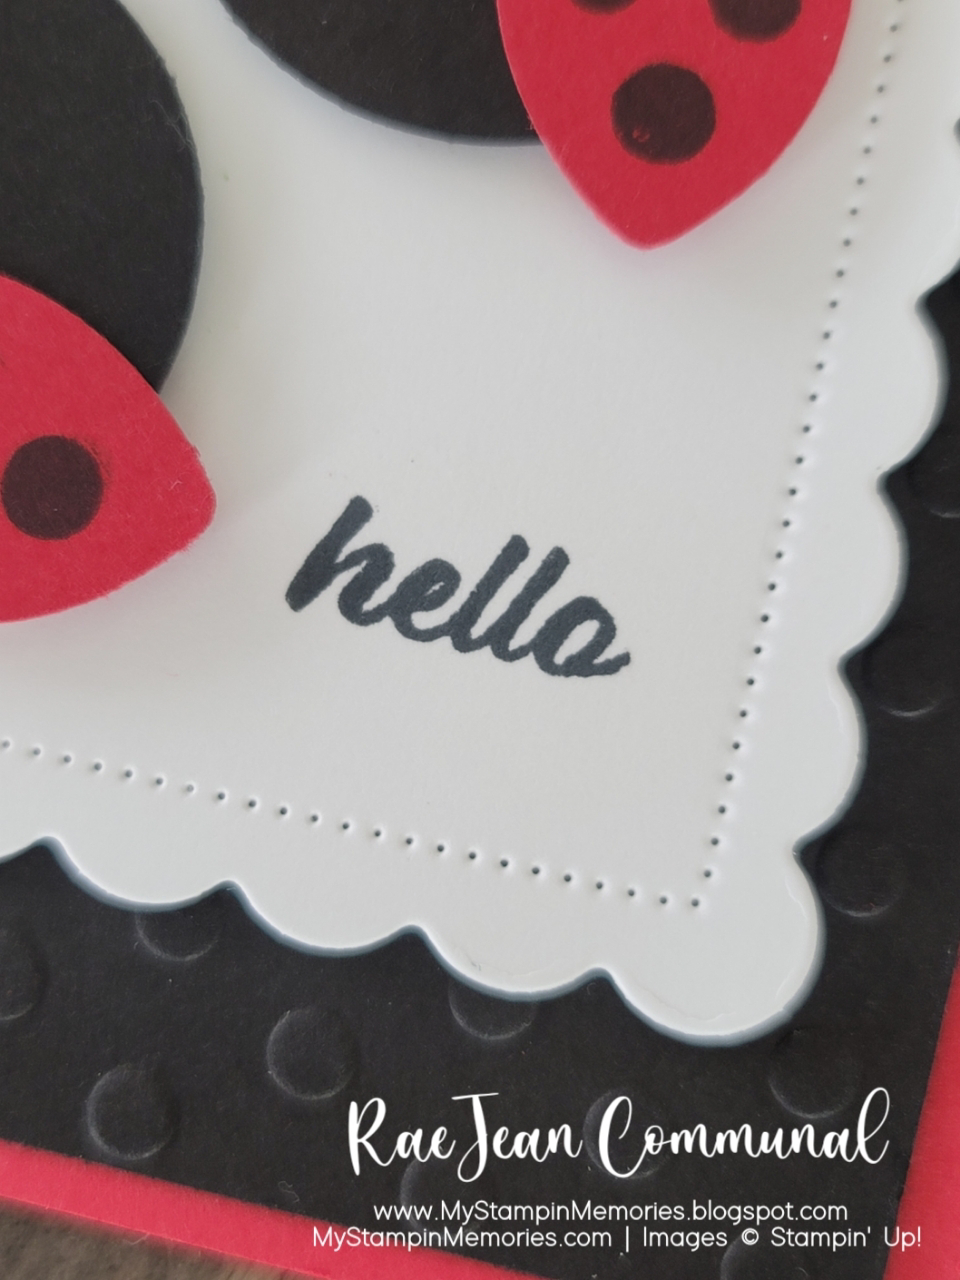
For the next step, you will need to die cut the Basic White Scallop Rectangle layer using the Scalloped Contours Dies. Stamp the "hello" sentiment in Memento Tuxedo Black Ink on the bottom right hand corner of the die cut.

Now we have reached the fun part! Using the Ladybug Builder Punch, punch out the body using Basic Black cardstock & the wings in Real Read cardstock. Stamp the polka dots on the wings using Memento Tuxedo Black Ink. Attach the wings to the body using dimensionals.

I attached the Scallop Rectangle die cut to the card base using several dimensionals. Lastly, attach all three ladybugs by rotating each one using dimensionals.
That's it! I hope you like the card I shared today. The Hello Ladybug Bundle is one of my top ten favorite items in the Spring Catalog.
Happy Stamping!
SHOP ONLINE: Click on the images below. It will automatically take you to my Online Store.
When you place an order of $25 or more using the HOSTESS CODE: GAMZ23HM you will receive a FREE GIFT from me!
Shop Online HOSTESS CODE: GAMZ23HM
Click here to Shop Online:
Comments